|
Recovering from an injury can be a nuanced process - there are some symptoms that you should listen to and others that aren’t so important, poor information abounds during searches on Dr. Google, there are friendly recommendations to try certain products, drugs or stretches, and just when you think it is okay to resume your normal activities pain may re-surge. It can be confusing… That being said, if you focus your attention on the overarching principles of an effective rehab, recovery doesn’t have to be complicated! Here are few key areas that anyone can assess and will help to simply your return to wellness: 1. Time  A) If you’ve sustained an injury, rehab will take time. Determining its severity can help you plan your rehab timeline. If it’s a small injury (micro-tearing or grade 1 sprain/strain), allow three days of relative rest for the injured area and slowly start to return to your sport. If it was a moderate or severe injury (grade 2-3 sprain / strain, fracture), you will need more time to allow the injury’s wound margins to heal back together. Due to the magnitude of a more severe injury you will likely benefit from a support (see below) and clever ways of modifying activity/programming. B) If you are not seeing many signs of improvement from your injury within a week, consulting a health care provider (Physio/Doctor) is a good idea. Diagnosing the injury and its severity will be important for your rehab strategy and long-term success. 2. Exercise 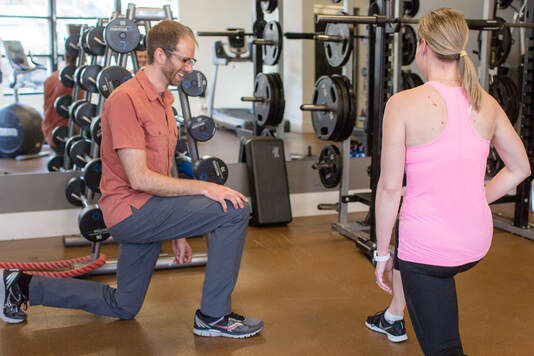 A) Make sure that you perform exercises specific for your injury/dysfunction. Your exercises should address all three of the following:
3. Supports 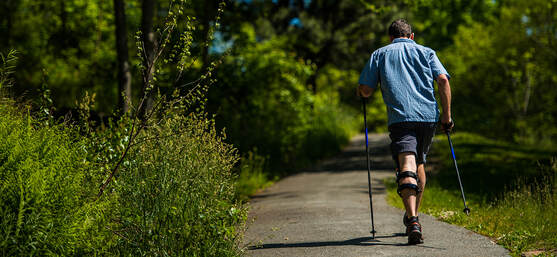 A) Your recovery from an injury may be uncomfortable but it needn’t be exquisitely painful. Utilizing walking aids (crutches/cane/walking poles), braces, taping techniques, medication (oral, topical or injections) or certain types of shoes/orthotics may help to alleviate some of your pain. These supports are not be relied on for very long, but can help reduce the harmful effects of feeling too much pain during your recovery. 4. Activity level  A). Many of my clients see me because they have slow progress or are seeing no progress. This is often because #2 is not being addressed and clients are often doing too much or too little activity in their day to day life. Determining the appropriate amount of activity requires:
Concluding Remarks Creating a good rehab program is an art. Of course there are other items to consider whilst recovering from an injury, but if you can dial in these four key areas it should help with setting realistic expectations and executing a planned recovery.
As always, if you have any questions feel free to send me an email or leave a comment!
2 Comments
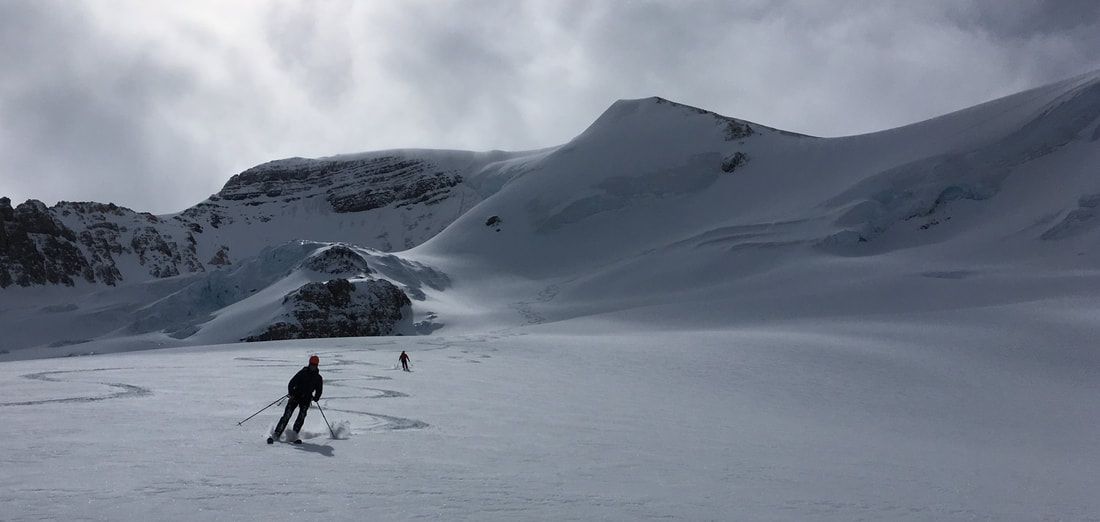 There's nothing quite like skiing in the Rockies... History of Knee Pain It's about this time of year, every year, that people living in north of California think about strapping on skis for the winter. The most common concern is regarding knee integrity and readiness to ski. I like to group the concern into three groups:
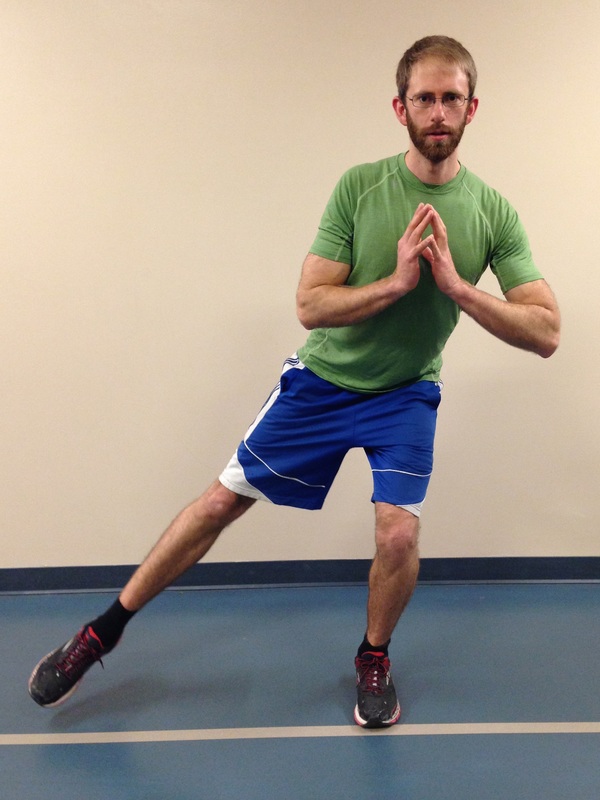
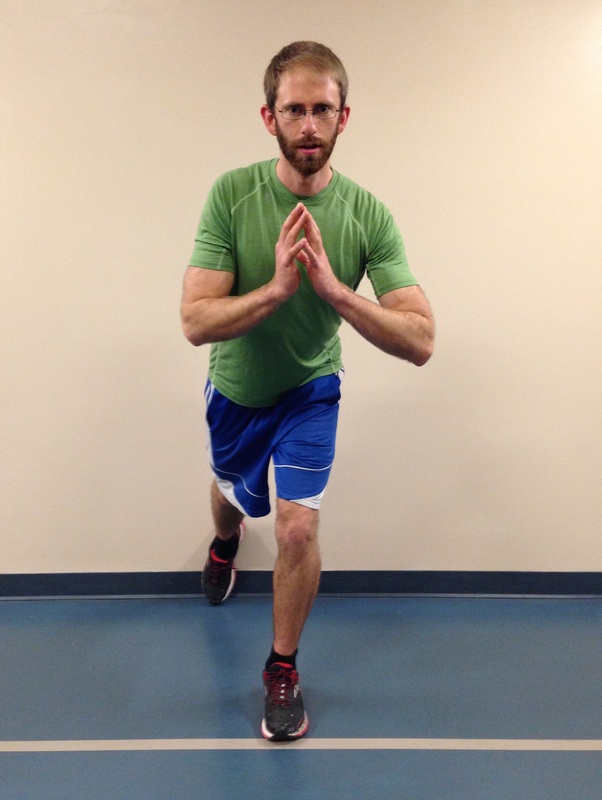
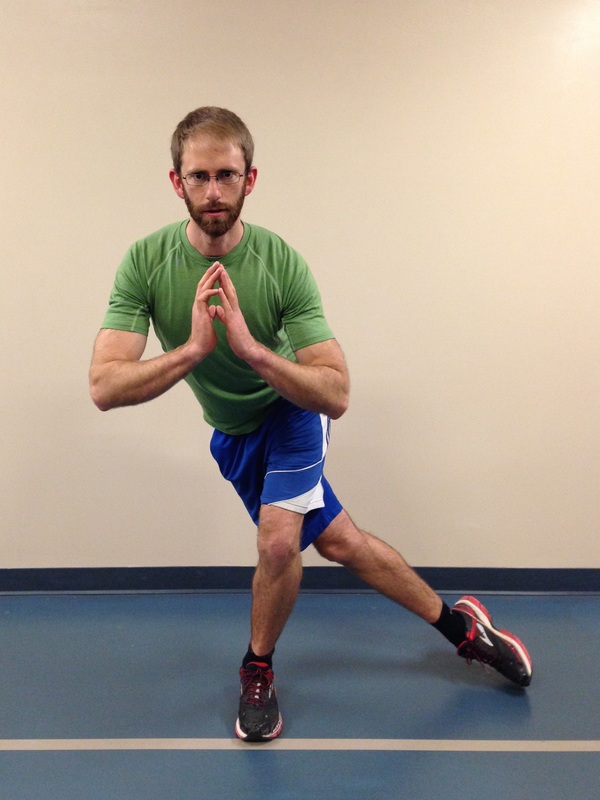
Chances are that if you fall into group 3, you will likely ski and have an injury-free season (but unfortunately there is always a first time for everything…). If you fall into group 1 or 2, you’ll likely appreciate the remainder of the article. Knowledge is power – use the following information to shape your training and awareness! Mechanism of Ski Injuries Fact The knee has two joints – the tibiofemoral joint and the patellofemoral joint. Skiing loads both joints tremendously, in different ways. The two most common knee injuries from skiing include ACL (anterior cruciate ligament) tears, and patellofemoral dysfunction (knee cap pain). ACL Tears ACL tears are acute, and often a result of catching an edge, crashes or poor landings. They often fall into one of three categories: 1) Slip Catch: Commonly seen while turning when the inside edge of the outer ski catches the snow surface, forcing the knee into a valgus collapse and internal rotation position (2).  2) Dynamic Snow Plow: When one of the ski edges accidentally engages the inside edge of the skis, and forces the lower leg to jerk inwards (valgus collapse). The tibia rapidly moves across the middle of the body and cause the valgus collapse of the knee. (1). 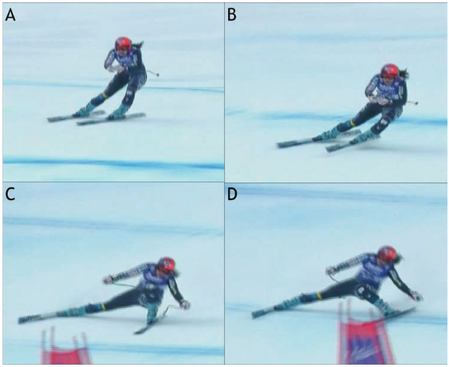 3) Landing Back-Weighted: A tactical error in jumping / landing and technique that leads to landing on the tails of the ski, which will stress the knee joint in an anterior/posterior shearing nature (1). 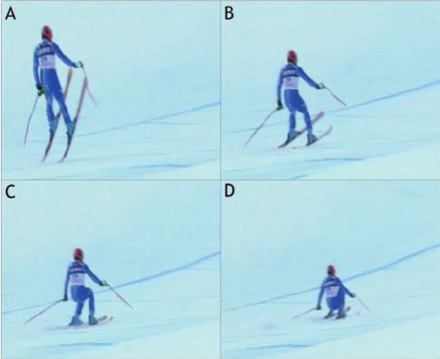 Patellofemoral Pain Patellofemoral pain often comes on from an accumulation of poor or excessive loading. The most common fault (and easiest to identify) is a valgus collapse of the knee. 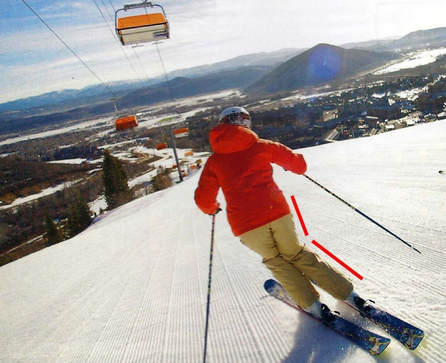 You can also identify this by watching someone squat or lunge, or squat / jump, as seen below. If the knee has a tendency to collapse inwards, the hip is usually doing a poor job stabilizing the knee. 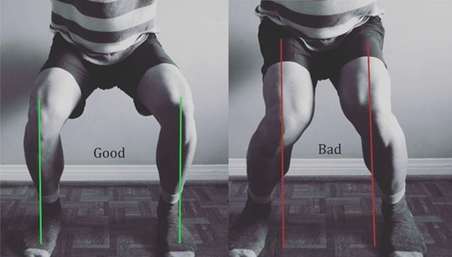 Other possible reasons for patellofemoral pain include overuse of the quads (anterior chain dominance, too much skiing too soon), tight quads (causing compression of the patella) or weak quads (causing poor stabilization of the knee cap for the load being placed). Training for Healthy Knees and an Injury-Free Ski Season An entire training program for proper knee function is outside of the scope of this article, however a couple good examples include:
General loading principles to abide by include:
A reasonable list of exercises (from basic to advanced) include: Two Leg Focused Exercises Hopping (forward/backwards, side to side, diagonals) Squat Jumps Burpees (with jump) Box Jumps Lateral Box Jump Overs (side to side) Hurdle Bounds Single Leg Focused Exercises Ski Hops Jumping Lunge Single Leg Hopping (forward/backwards, side to side, diagonals) Single Leg Hopping (through cones or agility ladder) Single Leg Hurdle Bounds Perfecting Your Technique During the early part of the ski season, spend the first few ski days working on your technique. Perhaps some pointers from your friends or a ski instructor would be helpful? As you scroll up and review the possible injury mechanisms, remember that strength and, more importantly, technique are to blame for most ski injuries. Pre-Season Stoke Now is the time to make a game plan. If you are excited for ski season, let this fuel your training! Any level of commitment to pre-season strengthening is better than nothing! The ideal goal would be to get into the gym 3 times a week for strength training, but start with whatever you can commit to. If you currently have pain, and aren't sure where to start, make an appointment with a physiotherapist or sports medicine physician. See you out there! References 1) Bere, T., Flørenes, T. W., Krosshaug, T., Nordsletten, L., & Bahr, R. (2011). Events leading to anterior cruciate ligament injury in World Cup Alpine Skiing: a systematic video analysis of 20 cases. Br J Sports Med, bjsports-2011.
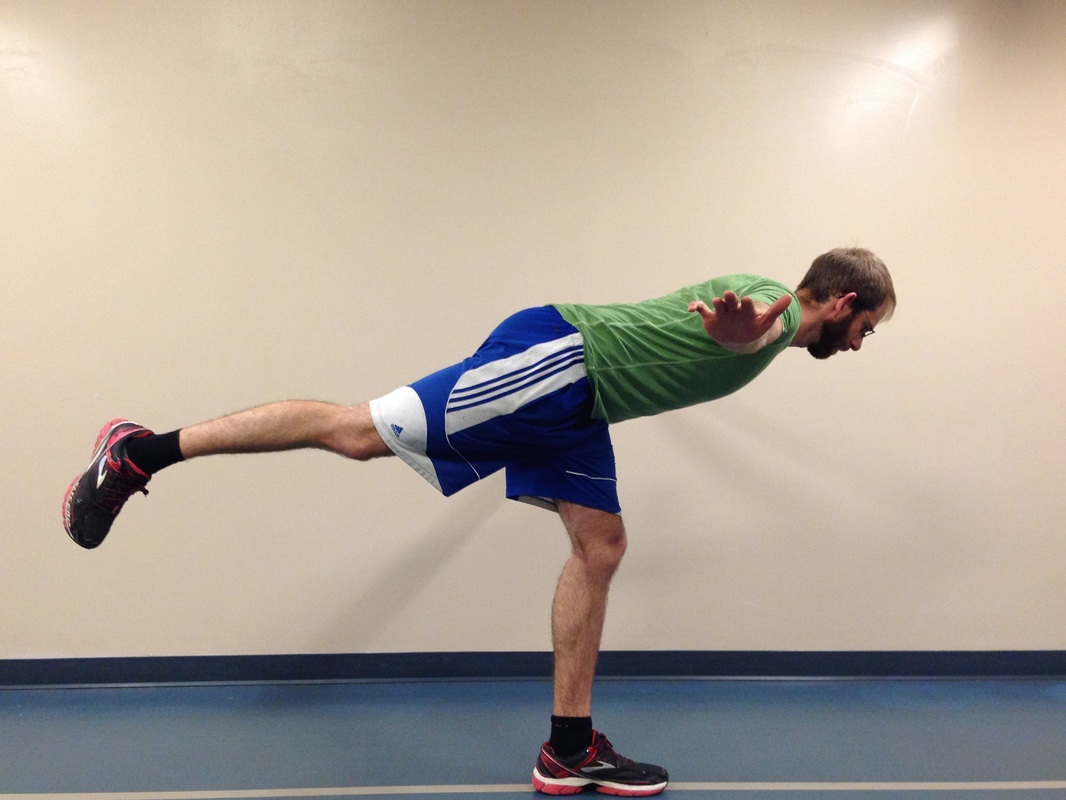
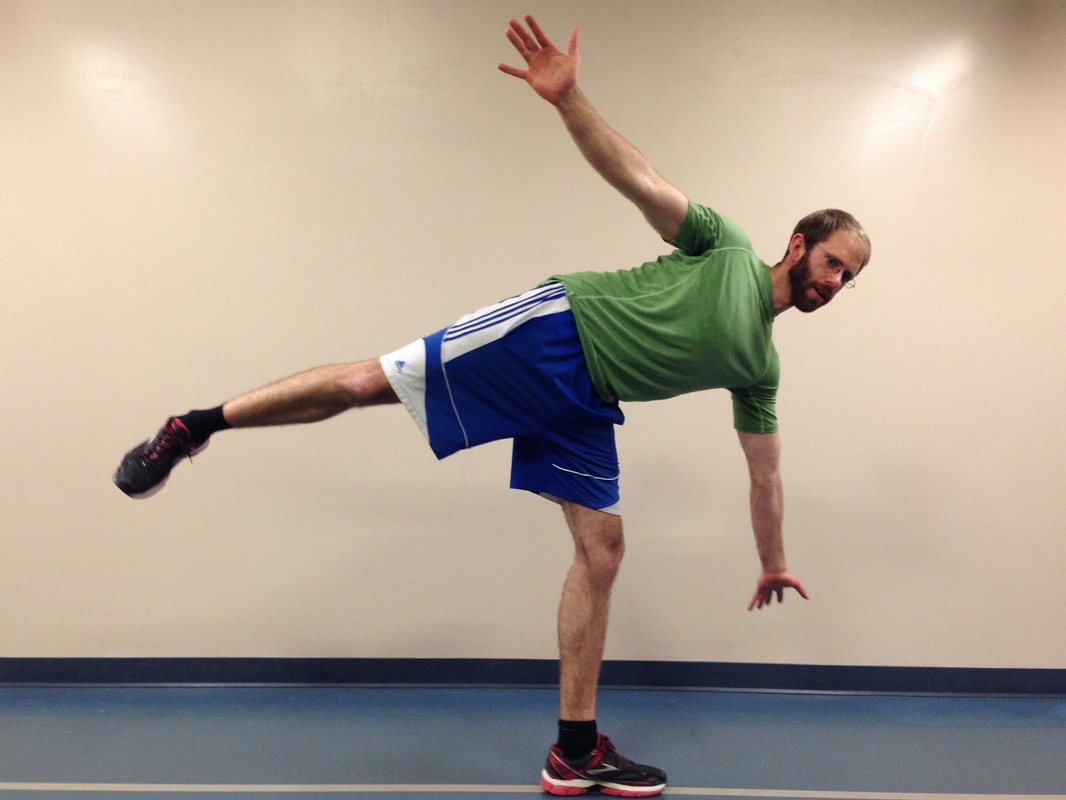
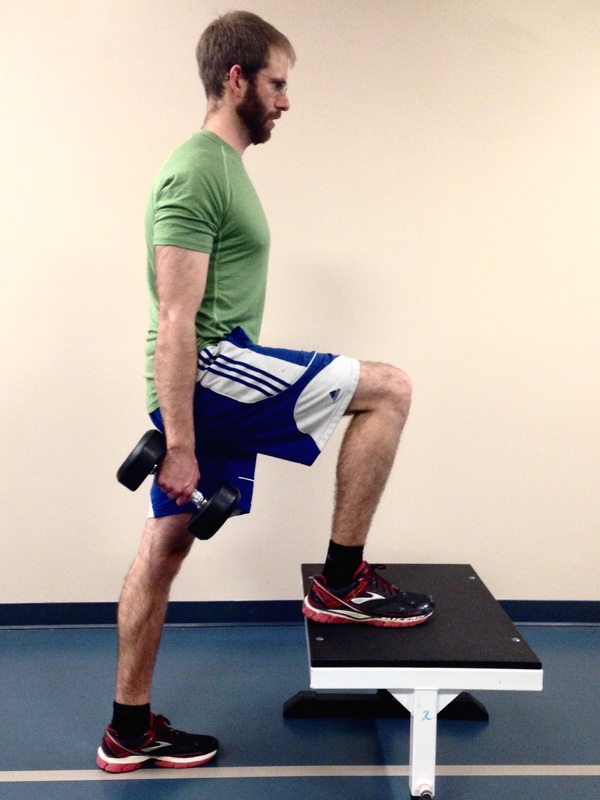
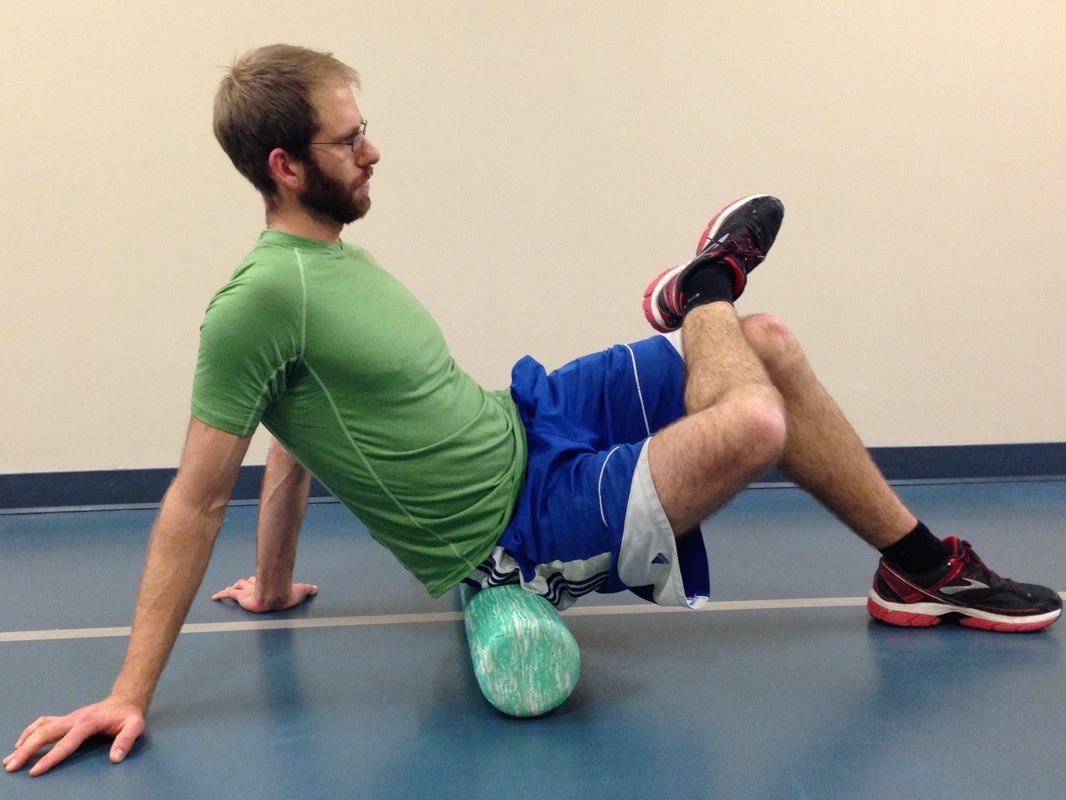
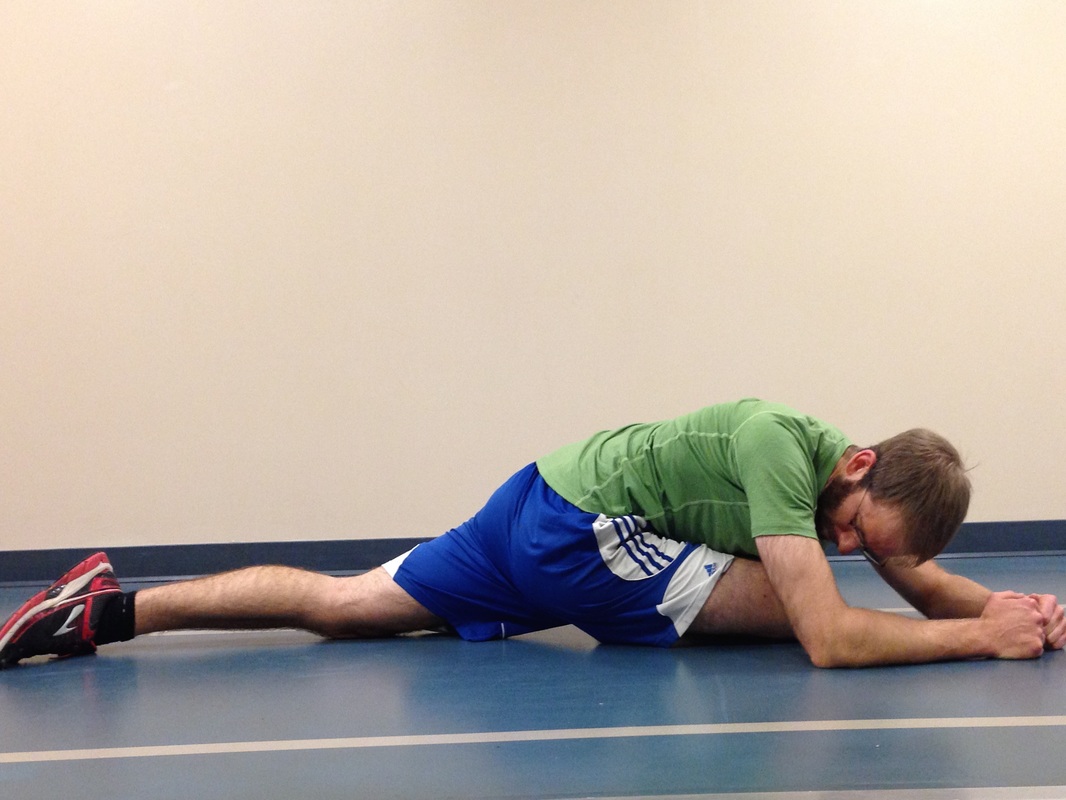
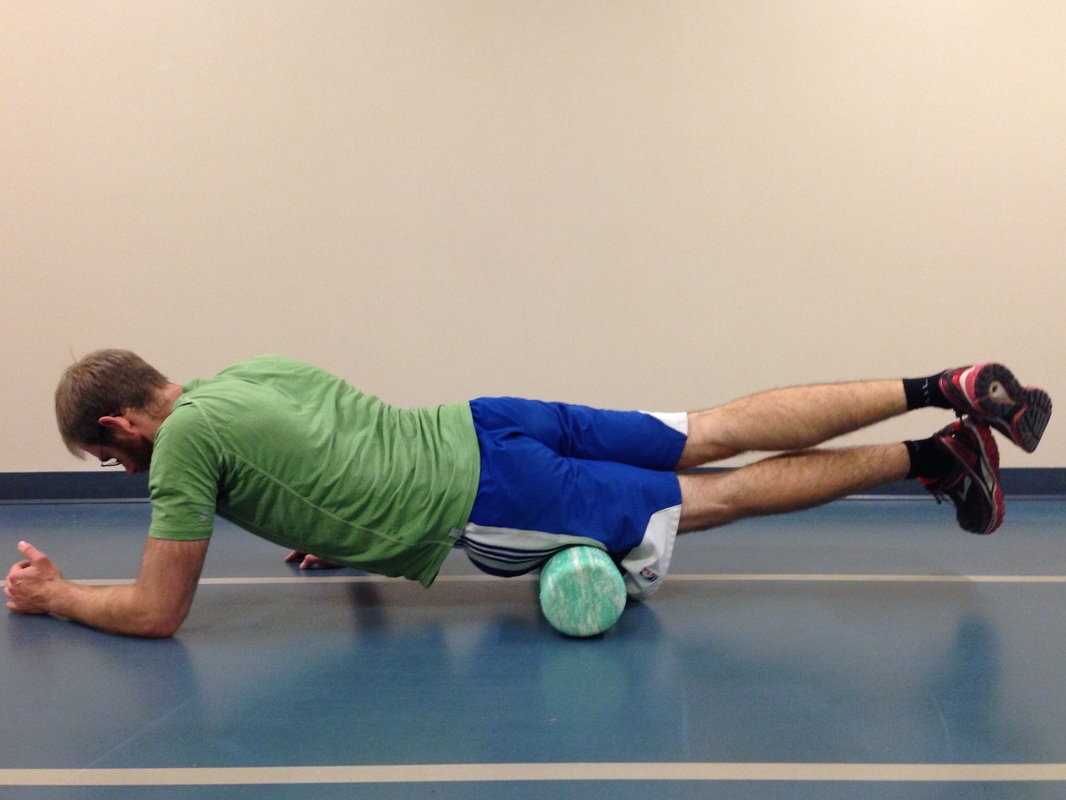
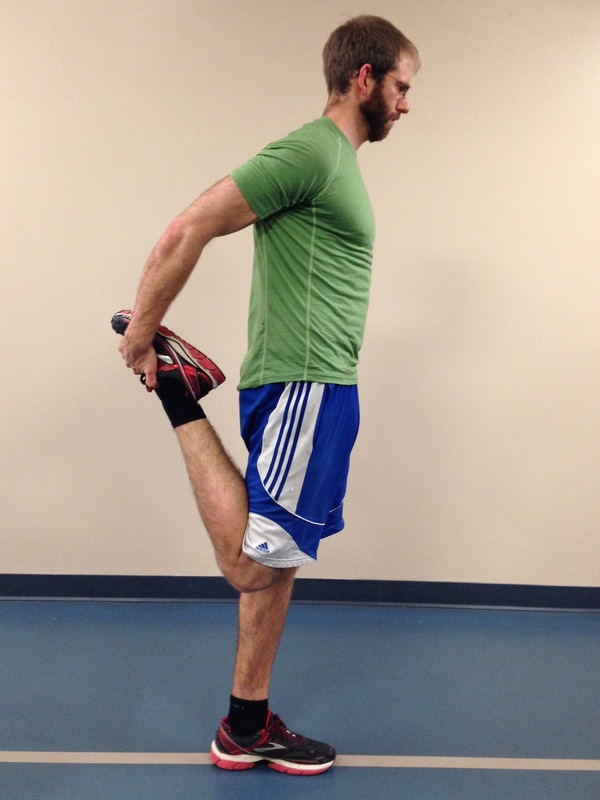
2) Bere, T., Mok, K. M., Koga, H., Krosshaug, T., Nordsletten, L., & Bahr, R. (2013). Kinematics of anterior cruciate ligament ruptures in World Cup alpine skiing: 2 case reports of the slip-catch mechanism. The American journal of sports medicine, 41(5), 1067-1073. The Great Outdoors. It is there for you to enjoy, to push your limits, and develop fortitude. For some people, going outdoors can be synonymous with developing injuries, but there are steps you can take to mitigate future injuries from taking place. The Right Fitness Level Greater fitness leads to a better understanding of your limits, as well as the ability to achieve greater feats. A physical assessment by a good therapist or strength and conditioning coach can help you sort through the thousands of exercises out there to know which ones are relevant to your needs. - Slow, gradual increases in exercise and specific training are necessary (months and/or years). Our bodies adapt well to gradual stresses, but if too much load is placed on it at once, expect failure and injuries. It takes great dedication to yield great results. Most outdoor athletes peak in their 30s and 40s as they build cardiovascular endurance, muscular endurance, and a resistance to injury. - Outdoor athletes often suffer overuse / over-training. It is important to consider whether you have proper body mechanics during training and outdoor pursuits. Have knowledgeable therapists, coaches and other athletes watch your form and provide suggestions. It is also important to include adequate cross-training, regular body maintenance (physiotherapy, massage, rolling), proper nutrition, and adequate rest. - As a general rule there are certain joints which must be stable (strong ligamentous and muscular support around the joint, which prevents excess joint motion) and others which must have good mobility (the joint is built to be very flexible, however the muscular support around the joint must be able to control this increased range). As pertaining to lower body exercise, the core must be stable, hips must be mobile, knees must be stable, and the ankles must be mobile (Cook, Burton & Kiesel, 2010). Try adding the following 20-minute routine into your regular workouts, three days a week. It is a small corrective exercise program built to help the user become more aware of hip / knee / ankle positioning during single leg stance. It is not meant to replace regular strength training. Rather, it should enforce the principles of joint alignment, feeling posterior chain engagement and will allow good transfer to outdoor pursuits. A) Dynamic stretching. Perform dynamic stretching prior to exercise for 30 seconds per muscle group. A few lower body ideas include front/back and side-to-side leg swings, quick quadriceps stretches, quick piriformis/glute stretches, and hopping. B) Airplane. At first you may need to hold onto something for balance, but eventually you should be able to progress to no hands. Goal = 10 reps per side. C) Step-ups. Face a mirror and line up the hips and knees on the working leg to be approximately 90 degrees. Ensure that during the exercise, your knee tracks straight (not allowing it to collapse inwards or outwards). Lean forward, try to feel your glutes and hamstring fire on the upper leg then push through the heel on the working leg as you step up (this will help you to activate the posterior chain). Goal = 10 reps per side, with 2 times the expected weight of your backpack and gear. D) Single leg star balance. Reach as far in each of the four directions as possible, while bending the stance leg at the hip and knee during the reaching phase (this leg should remain straight in line from the hip to the foot). Goal = 10 reps for each leg. 1 rep = a full cycle of the four directions. Side note: Work to create symmetry in this test, as evidence suggests that a difference of more than 4 cm between left and right legs in ‘the forward reach’ component can help predict whether an athlete is at risk of injuring the leg (Smith, Chimera & Warren, 2014). Tip: Place masking tape on the ground and mark the distance in centimeters. E) Piriformis rolling and pigeon stretch. 1 minute rolling, 1 minute stretch per side. F) Lateral Quadriceps rolling and stretch. 1 minute rolling (focus on the outside of the leg), 1 minute stretch per side.
|


| Start With The Right Intel - Create specific training goals: How many days/hours, what gear do I need to use, am I familiar with the terrain? - Become efficient and effective in your skill-set by learning the best decision making skills and techniques via free resources (friends, books, videos), and progressing to courses or hiring a guide. | The Right Gear - Hiking poles take up to 25% of stress off your knees during descent (Schwameder, et al., 1999) help your legs save energy, and improve your balance on technical terrain. - Boots that fit well can prevent crushed toes, and rolled ankles. - Bring microspikes, mountaineering gear and/or avalanche gear if you expect snowy conditions. |
References
Schwameder, H., Roithner, R., Müller, E., Niessen ,W., Raschner, C. (1999).
Knee joint forces during downhill walking with hiking poles. Journal of Sports Science, 17(12): 969-978.
Smith, C.A., Chimera, N.J., Warren, M. (2014). Association of Y balance test reach asymmetry and injury in division I athletes. Medicine and Science in Sports and Exercise. Epub ahead of print.
Warning Signs
Some examples of objective signs may include changes (over the last week(s) / month(s) / year(s) in:
(1) Range of motion (ROM)
Has there been a change in your active or passive ROM? Does the end-feel of the last few degrees of your ROM feel the same as it always has? (i.e. does it feel like a muscle stretch, bone-on-bone, tissue approximation?
(2) Coordination
Can you perform simple and complex movement skills as easily as before? Are your movements performed with precision?
(3) Strength
Have you noticed any changes in your ability to access your muscle strength, endurance or power?
(4) Speed
Are you able to move as quickly in different movement patterns as before? Do you fatigue more easily?
(5) Symmetry
Are you able to control the left side of your body as well as you are on the right? Do your movements look symmetrical on both sides when you perform them in front of a mirror?
Some examples of subjective signs may include:
(1) Lack of confidence
Do you feel an incapability to execute the skill well? Does something just feel "off"? The skill may look well coordinated but may just feel uncoordinated.
(2) Poor decision-making when performing a skill
Are you able to make tactical decisions about using the skill? While performing a skill, are you able to make decisions regarding your environment to determine what your next course of action should be?
(3) Inability to multitask
Do you find it more difficult to talk (or do any number of other skill-sets) while you perform a skill?
(4) Poor body language
Do you feel awkward performing a skill that you used to be proficient in performing? Do other people seem to smile or chuckle while you perform the skill?
(5) Validated outcome measures
These outcome measures may help provide the patient with some insight into tasks they perform in their life that are difficult for them to do, even if they do not perceive symptoms to be present. This helps to create self-awareness. (Outcome measure examples include: Roland Morris Disability Questionnaire, Upper Extremity Functional Scale, Upper Extremity Functional Scale, etc.)
Onset of Symptoms
Your liberation from the symptoms will result from:
(1) Determining the root cause of the injury.
(2) Fixing the problem before permanent damage occurs.
(3) Learning from it and becoming more aware of your body.
(4) Developing more strength and coordination than before to prevent a similar injury from reoccurring.
(5) Gradual return to the sports / activities you enjoy.
Concluding Remarks
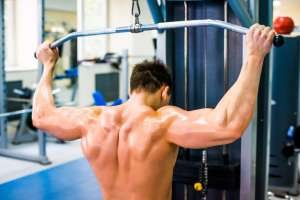
1) Behind The Head Lat Pull Down
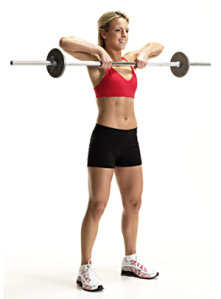
2) Upright Row
3) Traditional Sit-ups, Crunches and Machines that Simulate Sit-ups
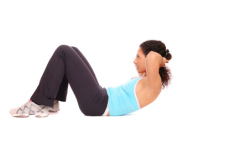
Going back to basics for a moment- the core is essentially meant to create spinal stability. Another way for me to say this is that the core musculature is meant to functionally operate as an anti-mover for the spine, contracting isometrically. When you do a sit-up you are concentrically contracting the anterior core muscles. Additionally, Stu McGill’s research shows that each intervertebral disc in the lumbar spine has a finite number of spine bends (flexion) that it can tolerate. Due to the structure of the discs, repeated flexion (think rounding the back) is one of the worst motions for lumbar spine health. Crunches, sit-ups, and most abdominal machines in the gym FLEX the spine! So ..stop it!.. and stick to planks, and other exercises that keep the back in a neutral stable position.
4) Leg Press
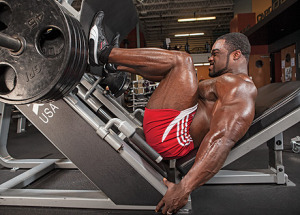
1) The back and feet are planted and impacts the proper knee arthrokinematics (the movement of the joint surfaces) of the tibiofemoral joint to take place. Typically as you straighten the knee, there is a conjunction external rotation of the tibia on the femur. It is hypothesized that this machine will affect this conjunct movement.
2) The back is flexed and thus it experiences high levels of stress placed on the discs (especially at the lumbosacral junction).
3) The exercise does not have a lot of functional carry-over to sport or daily life – Have you ever known anyone to sit down and push 400 lbs of weight? My recommendation – Train functionally in an upright position!
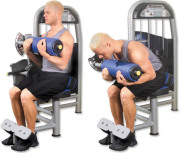
5) Knee Extensions
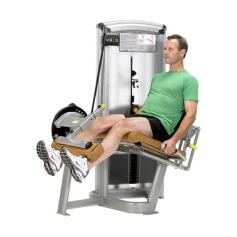
1) Patellofemoral Joint Arthrokinematics:
(A) The way that the patella (knee cap) moves on the femoral condyles changes depending on whether you are performing an open or closed-chain exercise. Powers et al. (2003) found that the patellofemoral joint kinematics during non-weight-bearing (open chain) exercises could be characterized as the patella moving on the femur, while the kinematics during weight-bearing (closed chain) exercises could be characterized as the femur rotating underneath the stable. The latter of the two conditions provides the least amount of stress placed on the patellofemoral joint.
(B) There is often additional stress placed on the patellofemoral joint because the load that you must push with your shin is anterior to the knee joint, whereas during a squat, the load is often through the knee joint or posterior to the knee joint.
2) Tibiofemoral Joint Arthrokinematics: For the same reason as explained in the leg press example above (#1), pushing your shin against the machine prevents some of the conjunct external rotation of the tibia on the femur, meaning that the joint mechanics may be dysfunctional and can lead to joint damage.
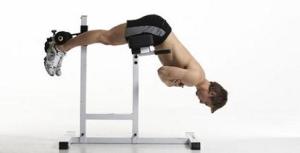
6) Back Extensions
7) Almost All Seated Exercises
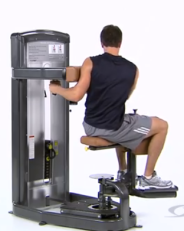
Lastly, when we must engage other muscle groups from a seated postion, we do not harness the stability and strength of the core. As a result we likely are weaker in that exercise, and we could be placing our body at risk for injury. Why? Because most sitting inhibits our ability to contract some of our core muscles (i.e. when sitting, the anterior abdominal cavity is compressed which inhibits the diaphragm from contracting), and some of our peri-core muscles (i.e. the glutes, hamstrings multifidi, erector spinae, etc. are lengthened and thus unable to contract as forcefully from the seated position).
Concluding Remarks
References
Author
Jacob Carter lives and works in Canmore, Alberta. He combines research evidence with clinical expertise to educate other healthcare professionals, athletes, and the general public on a variety of health topics.
Archives
November 2022
July 2022
January 2022
February 2020
May 2019
April 2019
July 2018
May 2018
March 2018
January 2018
October 2017
September 2017
March 2017
February 2017
December 2016
November 2016
October 2016
May 2016
March 2016
January 2016
June 2015
February 2015
December 2014
October 2014
September 2014
Categories
All
Aging Population
Annual Check Up
Annual Check-up
Annual Physiotherapy Assessment
Calgary
Canmore
Climbing
Collaborative Care
Concussion
Core Muscles
Disease Prevention
Exercise
Exercise Selection
FDN
Frozen Shoulder
Functional Dry Needling
Health
Health Promotion
IMS
Inflammation
Injuries
Injury Prevention
Intramuscular Stimulation
Jacob Carter
Literature Review
Lumbar Spine
Manual Therapy
Mountaineering
Pain
Personal Training
Physiotherapy
Preventative Medicine
Rehabilitation
Research
Shoulder Impingement
Shoulder Injuries
Skiing
Ski Injuries
Ski Season
Swelling
Tendinopathy
Tendinosis
Tendon
Tendonitis
Trail Running
Wellness
 RSS Feed